Showing posts with label Dirty Dishes. Show all posts

Wednesday, January 16, 2013

Fix Me A Chicken* Pot Pie!

One of the very best things I did for myself before Mia made her entrance into the world was to fill our freezer with food. There were many, many items on my "Things To Do Before Baby Arrives" list that I did not get around to, like finish the baby blanket I started knitting six months ago or get Anna out of diapers. But with about two weeks until her due date, I began stockpiling freezer containers and doubling our favorite recipes. Chili, spaghetti sauce, beef and barley soup - it was such a huge relief those first few weeks to know that my family was going to be eating a healthy meal that didn't require much more than heating up.

The night before my water broke, I tried out a new recipe for chicken pot pie - mostly because it made two and I was excited to hoard even more food for my freezer. I also really, really love all things pie. Chicken pot pie was always on my list of favorites growing up, but for some reason the idea of baking one just seemed like it would be way too difficult. Even after mastering Beef & Cheddar Pie, I assumed chicken pot pie would just be more hassle than it was worth.

I was wrong. It's actually not that hard. And it's so, so good.

I should first admit, though, that this recipe calls for store-bought pie crust. Maybe someday I'll tackle my fear of pie crust, but for now I'm happy to buy it. You can definitely use homemade if you're super talented like that...just stop showing off, would ya?

This is comfort food at its finest, and will always remind me of the last meal I prepared before we became a family of four.

Chicken Pot Pie


What you need:

I apologize in advance for these pictures. They're terrible.


2 cups diced, peeled potatoes
1 3/4 cups sliced carrots
2/3 cup chopped onion
1/2 cup butter, cubed (the original recipe calls for a full cup, but it's still plenty rich!)
1 cup all-purpose flour
1 3/4 tsp. salt
1 tsp. dried thyme
3/4 tsp. pepper
3 cups chicken broth
1 1/2 cups milk
4 cups cubed cooked chicken (from 3-4 chicken breasts)
1 cup frozen peas
1 cup frozen corn
pastry for two double-crust pies

What you do:

1. Place potatoes and carrots in a large saucepan and cover with water. Bring to a boil. Reduce heat; cover and simmer for 8-10 minutes or until crisp-tender. Drain and set aside.


2. In a large skillet, saute' onion in butter until tender. Stir in the flour, salt, thyme, and pepper until blended. Gradually stir in the broth and milk. Bring to a boil, then cook and stir for two minutes, or until thickened. It might start out kind of lumpy, but keep stirring! Add chicken, peas, corn, potatoes, and carrots. Remove from heat.


I know. Doesn't look that appealing. I promise, it gets better.

See? Told ya!


3. Line two pie plates with pastry. Fill with mixture. Top with remaining pastry and seal edges.


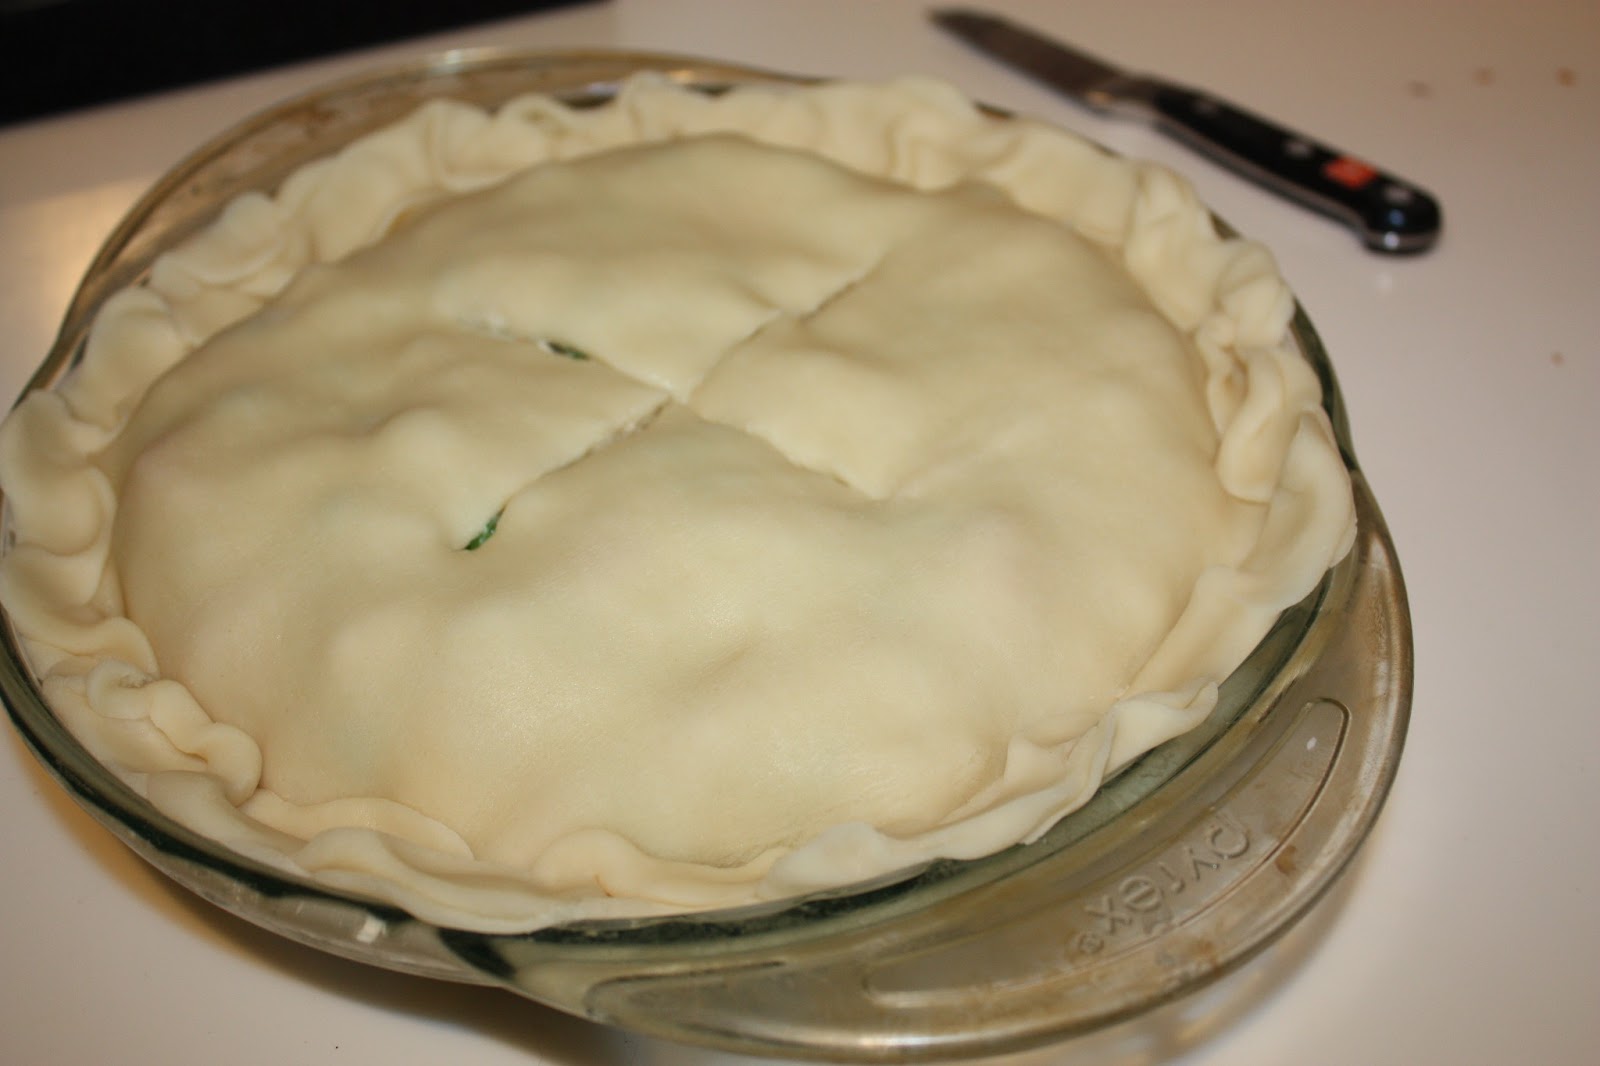
4. Bake one potpie at 425 for 35-40 minutes. Let stand for 15 minutes before serving. Cover and freeze remaining pot pie.

Ummmm. Mine got a little overcooked. But still delicious!

To use frozen pie: shield edges with foil and place on a baking sheet. Bake at 425 for 30 minutes, then reduce heat to 350 and bake for 75-80 more minutes. Let stand 15 minutes before serving.


Mike and I have been known to fight over the leftovers.


What's your favorite comfort food?
Are you as obsessed with freezing meals ahead of time as I am?

Will I ever finish that baby blanket?

Happy Wednesday!

*I realize that the original quote from "The Breakfast Club" is actually turkey pot pie, but it just didn't work. But on that thought, this would be a great recipe to use leftover Thanksgiving turkey!

Monday, August 13, 2012

The Grilled Pizza Incident

A few months after we moved back to Michigan, Mike made plans to get together with his friend Tom and his new (at least to us) girlfriend Melissa. As is probably typical with a married couple in those first sleep-deprived months of parenthood, we somehow got our signals crossed and I found myself covered in dirt from working out in our garden all afternoon with a house full of guests, no food in the house, and a vague idea in my head that I was planning on making grilled pizzas for dinner. My visions of being one of those cool, have-it-all-together moms were quickly going down the drain as introductions were being made and I was trying to downplay the awesomeness of my muddy Crocs and hide the fact that I had absolutely no fancy edible snacks to offer. (Have I mentioned that Melissa is drop-dead gorgeous and a *few* years younger? Sigh.)

After a quick shower and rushed trip to the grocery store, I returned to make amends and dazzle them all with my grilled-pizza-making-skills. Once they taste this, I thought to myself,  I will be totally redeemed and they will forget all about the stale bag of pretzels I offered them and realize I am a cool mom after all!

Yeah, not so much. I guess in my haste I forgot to look up the recipe, because the damn pizzas took FOREVER to cook. I'm pretty sure Tom and Melissa left before anything was done, claiming the need to be at a graduation party, but in reality they probably got so hungry they needed to make a break for it before they passed out from hunger.

I am proud to say that since that awful, awful May day I have totally perfected the grilling of the pizza - in fact it's probably been one our favorite summer meals.

Except Tom and Melissa just had to move to Colorado, so even if I wanted to prove to them that I'm not a total spaz, I couldn't.

The best I can do is share my recipe and technique. So here it goes...

Spoiler Alert: This is going to get long. It's really not complicated, just lots of steps, especially if you are going to be making your own dough and sauce. You can totally skip those steps and just move right on to the grilling technique if you want!

The first part is the dough. When we lived in South Carolina, our grocery store sold fresh pizza dough that was awesome. I haven't been able to find it here, but after trying a few recipes I think I've found the best one. It is, in fact, called "The Best-Ever Pizza Dough" and can be found here. It's perfectly chewy and crispy, just the way I like it. You need to make it at least a day in advance.

Ingredients:

1 cup lukewarm water (105-115 degrees) I never measure the temp...just use warm-ish water
1 tsp. honey
2 1/4 tsp. active dry yeast (the little packets they sell are exactly this amount, fyi)
3 cups (or more) all-purpose flour
1 3/4 tsp. coarse salt
2 tbsp. EVOO

1. Mix the water and the honey in a liquid measuring cup until the honey dissolves. Sprinkle with the yeast and let the mixture stand until foamy, about 5 minutes. Meanwhile, using a food processor, pulse the flour and salt to mix.


2. Pour the yeast mixture and the EVOO over the flour mixture. Process until the dough comes together in a sticky ball, 20 to 30 seconds.


3. Put the dough on a floured surface and knead until smooth and elastic, about 5 minutes.


4. Add the dough to a large, oiled bowl and turn to coat. Cover the bowl with plastic wrap and let stand in a warm, draft-free area until doubled in size, about an hour - I put mine in the microwave, just so it's safe from toddler hands or curious dogs.


5. Punch the dough down and put it back on a floured work surface. Quarter the dough using a knife.


6. With each section of dough, work it into a ball and roll it until smooth.

Rolling dough and taking pictures at the same time is not so easy - sorry for the crappy lighting!


7. Each dough ball goes into a plastic bag. If you are going to be eating it soon, refrigerate it for 10 to 48 hours, otherwise you can freeze it for up to two weeks. We usually eat two pizzas at a time and freeze the other two. Let the dough sit at room temperature for about an hour before you shape it, if it's been in the freezer let it sit out for two hours.


8. Working with one dough ball at a time, press it out onto a lightly floured work surface and press into the shape you want. I usually just go with the shape naturally - they never turn out totally round, more like ovals or rectangles. You could also cut the dough here to make mini pizzas if you want!


I like to make my own sauce, mostly because I'm picky and don't like sauce that tastes over-cooked or seasoned.  Here is my basic recipe - doctor it up as you like! This is enough sauce for two rounds of pizza, so I usually keep the leftovers in the fridge until we grill the second half of the dough, as long as it's within ten days or so.

Ingredients:

1 14.5-ounce can of diced tomatoes
1 14.5-ounce can of tomato sauce - but you probably only use about half the can
1 tsp. Kosher salt
1 tbs. EVOO
Fresh garlic, grated or minced- I usually use one or two cloves

1. Throw all the diced tomatoes, half the tomato sauce, the salt, EVOO, and garlic into a blender or food processor. Pulse a few times until you get your desired consistency. I like it a little chunky, but you can make it smoother if you want. Season to taste and add more tomato sauce until it's how you like it!


Now you are ready to grill. There are tons of recipes out there for different kinds of pizzas, but I have to admit that I'm a boring simple girl when it comes to pizza. I like plain cheese. Maybe some basil or fresh mushrooms.  No BBQ sauce or other crazy concoctions for this girl. But if you are into pizza that's a little crazier (Pepperoni? Calm down, would you?!) here is where you'd want to assemble all your ingredients.

Ingredients:

Pizza sauce - half of recipe above, about a cup
Pizza Dough
EVOO
Mozzarella cheese - 1 to 2 cups
Toppings of your choosing

1. Preheat a grill to 500.

2. Lower the heat on one side of the grill to low. Oil the grate on that side of the grill. I sometimes use a paper towel soaked in oil with some tongs, other times I just use a pastry brush to put the oil directly on the crusts. I've even sprayed the crust with non-stick cooking spray before. Move the shaped dough to the grill. Lower the edge of the dough onto the oiled grill. For bigger pizzas, grill two at a time. If you're making mini pizzas you can grill eight at a time.


3. Cover the grill and cook until the crusts begin to bubble and brown, about 3 minutes. Loosen the crusts with a metal spatula and flip over, cooking until they begin to brown on the bottom, about 2 more minutes.


The back of our grill is a little hotter than the front, but even burnt it still tastes delish!


4. Flip the crusts back over to their original sides, but this time put a baking sheet underneath (thanks for the tip, Fred and Sarah!). Spread the pizza sauce over the crust and then sprinkle with cheese and any toppings you want to add. Cover and cook until the cheese is melty and golden, 2 to 3 minutes.


Can you guess which one I'm going to eat?


Hooray! You're done! I honestly think this pizza tastes way better than any you can get delivered, and it is SO much cheaper.


Plus, you could totally impress Tom and Melissa. If only they didn't live so far away...

Anna's face when I told her there were people out there who doubted my grilled-pizza-making-skills. She just can't believe it.

Happy Monday!

Wednesday, May 9, 2012

Noodles!

Now that the cat is out of the bag, so to speak, I want to make sure that this space doesn't become all pregnancy, baby, blah, blah, blah. Yes, obviously, I will write about my excitement and fear and all the other fun things that go along with bringing a person into the world - how could I not? But for today, I thought I'd share another of my favorite recipes. Especially since I finally feel like actually eating and cooking again.

I think I was first inspired to make this after reading a recipe in the Rachael Ray magazine. I kind of took what she offered and changed it up a bit to fit our tastes. It's an easy, quick meal that is awesome for summer, and it's totally toddler approved. It's also awesome because you can throw in whatever veggies you might have on hand. And the leftovers (if you have any) are delicious the next day - perfect to take to work or eat in the driveway while your kid creates masterpieces with sidewalk chalk!

Cold Asian Noodle Salad


What you need:

(Since this is not an actual recipe, my measurements aren't too exact. Sorry!)

1 package of Soba noodles - you could use rice noodles if you want to go gluten free, or even regular spaghetti would probably work
Ken's Lite Asian Sesame salad dressing - or something comparable. I also have made dressing from scratch using tamari sauce when feeding gluten-free eaters. Probably better for you, but I'm lazy!
Spinach, chopped - a couple of big handfuls
Carrots, grated - I used probably 7 or 8 baby carrots.
Fresh cilantro, chopped - a big handful
Peanuts, chopped - a handful
Green Onions, chopped - two or three
Any other fresh vegetables you want to add - this is a great way to sneak veggies in. I usually add an orange or yellow bell pepper, but I forgot to buy one. I usually add fresh basil, too, but I haven't started my garden yet and the basil at the grocery store didn't look that great. I bet cucumbers and tomatoes would be delicious!
Cooked Chicken - again, I'm lazy, so I used a rotisserie chicken (also, I'm struggling with raw meat these days), but you could save money by cooking your own.

What you do:

1. Prepare the noodles according to the directions. Soba noodles are super fast - they cook in about four minutes. Drain and rinse in cold water.

2. Chop or grate all your veggies and herbs and the chicken.

3. Mix it all together in a big bowl and pour the dressing on top. I just eyeball it - I try to go on the light side, that way you can add more if you want more flavor. Give it another stir and you are good to go!


Warning: Lady & The Tramp inspired eating may happen as a result of serving this meal.


Enjoy!

And not to be all pregnancy, baby, blah, blah, blah on you, but we're super excited because tomorrow we have our big ultrasound. Spoiler alert: not finding out the gender! Yes, yes, I know that this will drive most people crazy. But what can I say? We love a good surprise. And the color yellow.

Happy Wednesday!

Friday, March 23, 2012

I Need A Kristintervention

In more ways than one. For reals.

Today is my sweet sister's birthday. And while Kristin is basking in the sun in the faraway land known as Florida, I am sadly stuck in Michigan. (Although, no complaints about the weather, because I have been doing quite a bit of basking myself. Thank you, Mother Nature!)

We won't be drinking margaritas together to celebrate, but that doesn't mean she hasn't been on my mind all day, because I sure do miss her.

Do you know who else misses her?

My house.

Remember that time she came over and basically kicked my ass and ordered me around and forced me to get organized? Weeellll...let's just say I haven't exactly been living up to her expectations. I'm pretty sure every surface in my house has suffered my abuse, and it ain't pretty.

I don't think I can convince her to leave the beach to, ya know, beat me into organizing my life. Which means I must take matters into my own hands.

I've been pondering a few things I've seen on Pinterest, like a daily cleaning schedule or one of those "52 Weeks to an Organized Life" deals. I don't know. I'm feeling overwhelmed. And embarrassed.

On a scale from one to ten, how pitiful is it if a stay-at-home mom wants to hire a cleaning service? (Although, as I said to my friend Katie today, my house is too much of a wreck to probably even get a cleaning service to come!)

You gotta start somewhere, right? So Kristin, in honor of that magical day you entered the world, I'm going to clean at least one room of my house today. If that doesn't shout "I'm so happy you were born!", then I'm not sure what does...

Happy Birthday, sister! I hope your day is surface-abuse free and full of wonderful things that make you happy. I love you!


Anyone have any tips or pointers for me? Experience with those daily cleaning schedules? HELP ME!